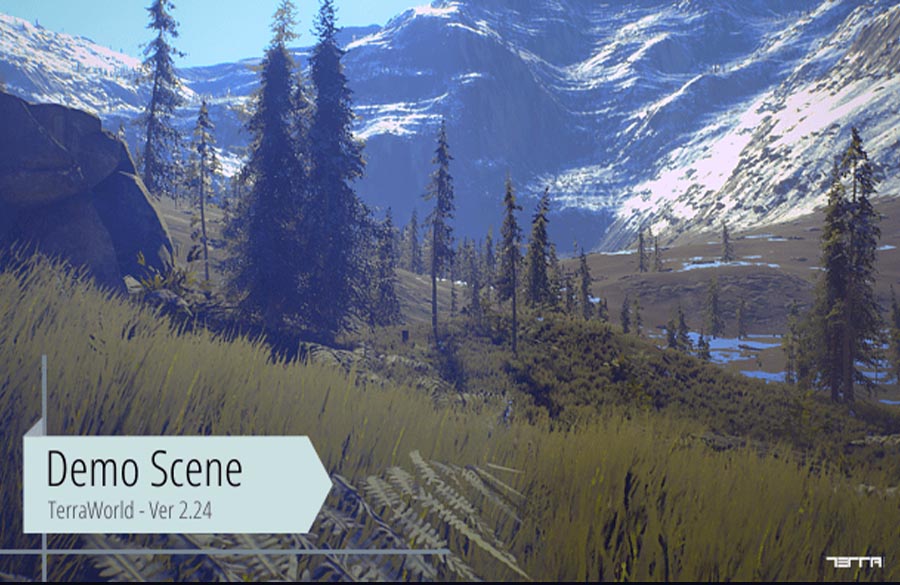
Here you can find executable built demos out of created scenes using TerraWorld
This build comes from the demo scene available in TerraWorld ver. 2.24 with some manual customizations using built-in editing tools in TerraWorld. The location of the scene is somewhere in Alps mountains which TerraWorld gathered real-world elevation, imagery and landcover data to process them with its built-in AI and procedural algorithms to create a digital twin of the area.
SCENE CUSTOMIZATION BREAKDOWN
First of all, any modifications in the demo scene has been made using current built-in tools in TerraWorld and no 3rd party addons used at all. So when you own TerraWorld, you have given this scene as a fully editable world including editing tools and components which you can go ahead and change things here and there for yourself.
- Since our terrain uses Procedural Puddles as a feature, so puddles are automatically scattered on flat areas of surface. To bring life to them and add reflections on top of these wet areas on terrain we turned on Screen Space Reflections in the Post Processing Profile used for the scene located in its dedicated world folder in project.
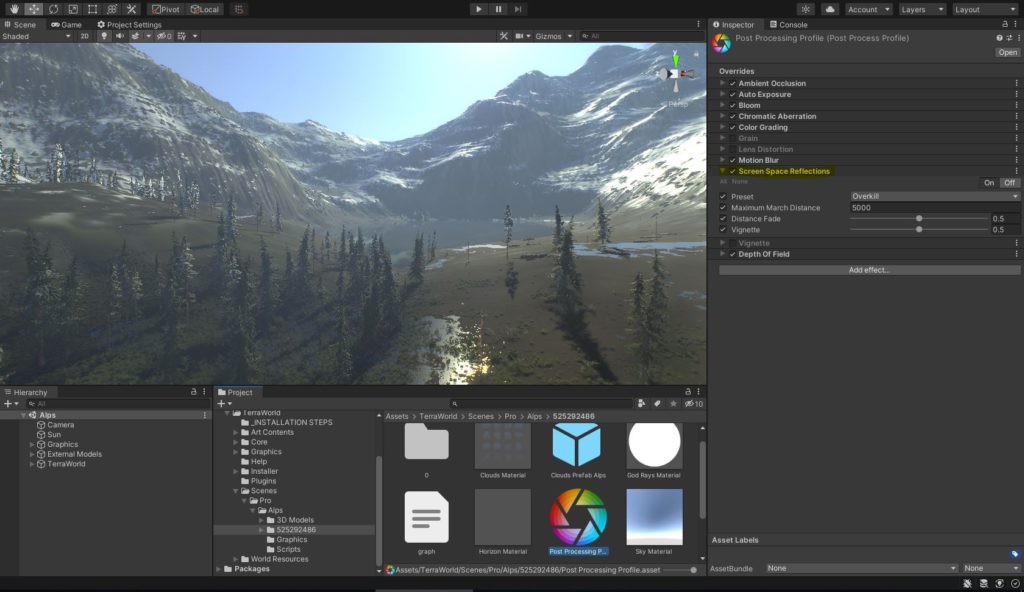
So puddles become from this
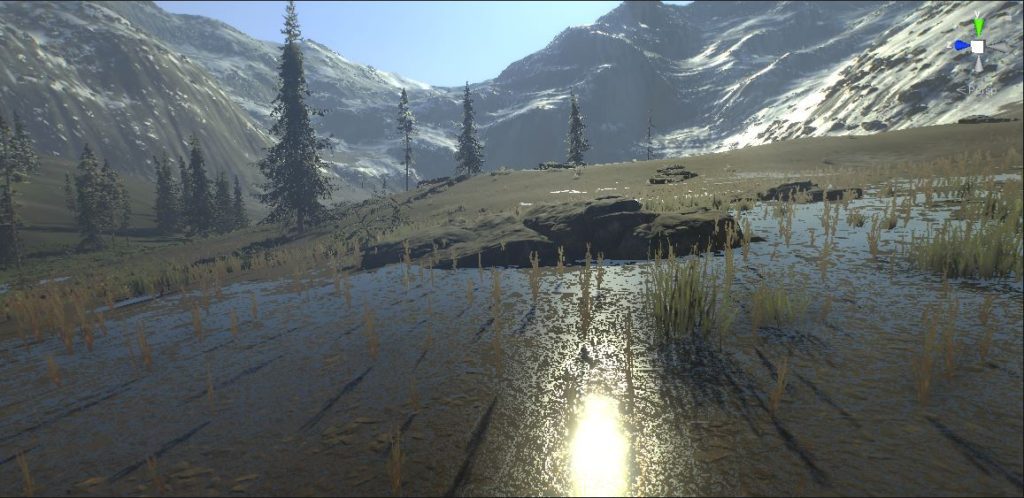
To this
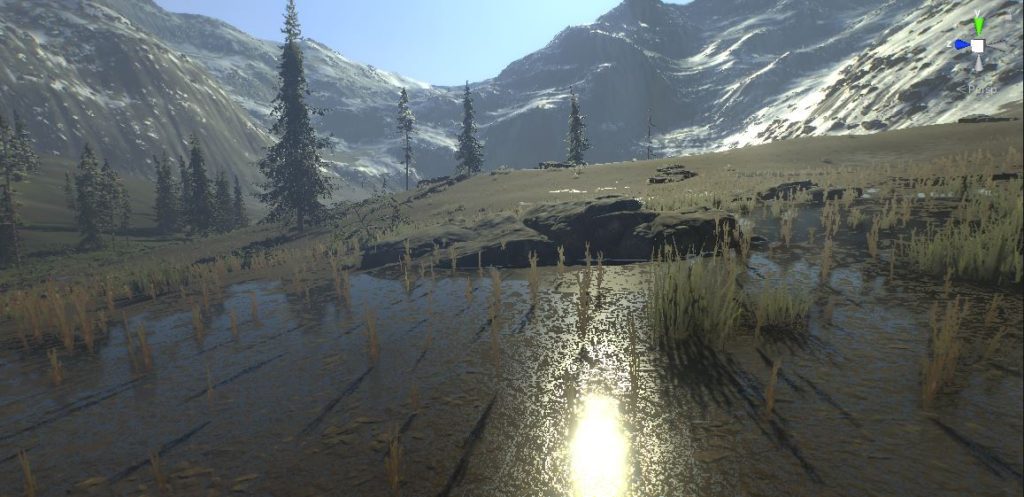
- Besides brush editing tools embedded in WorldTools component to paint/erase models in batch mode, it comes with features like AUTO SYNC to adopt all layers when terrain heights or textures changing, plus Terrain Textures Filtering to include/exclude all models based on painted textures on terrain.
We don’t want any vegetation or small details on rocks textures; so by using WorldTools component accessible from the TerraWorld gameobject in scene hierarchy, we can go to the TERRAIN LAYERS (TEXTURES) FILTERING section and setup our texture filtering logic.
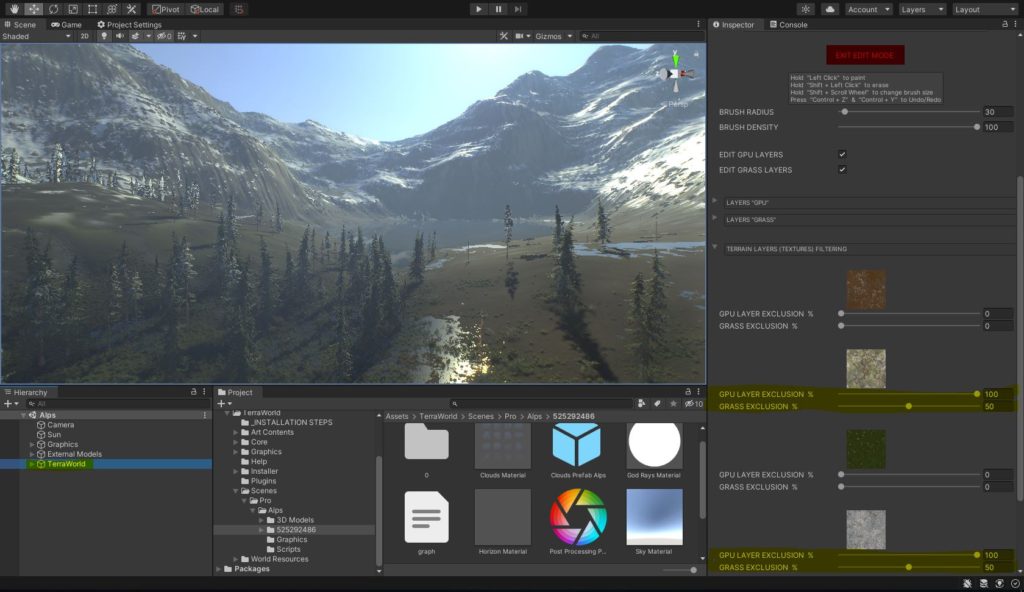
We brought up Exclusion Percentage to 100% for bigger 3D models (trees, rocks & boulders, big bushes) and 50% for smaller details (grass, flowers and plants and small bushes). This leads to have all 3D models and vegetation to be excluded from these 2 rock textures on terrain in a batch.
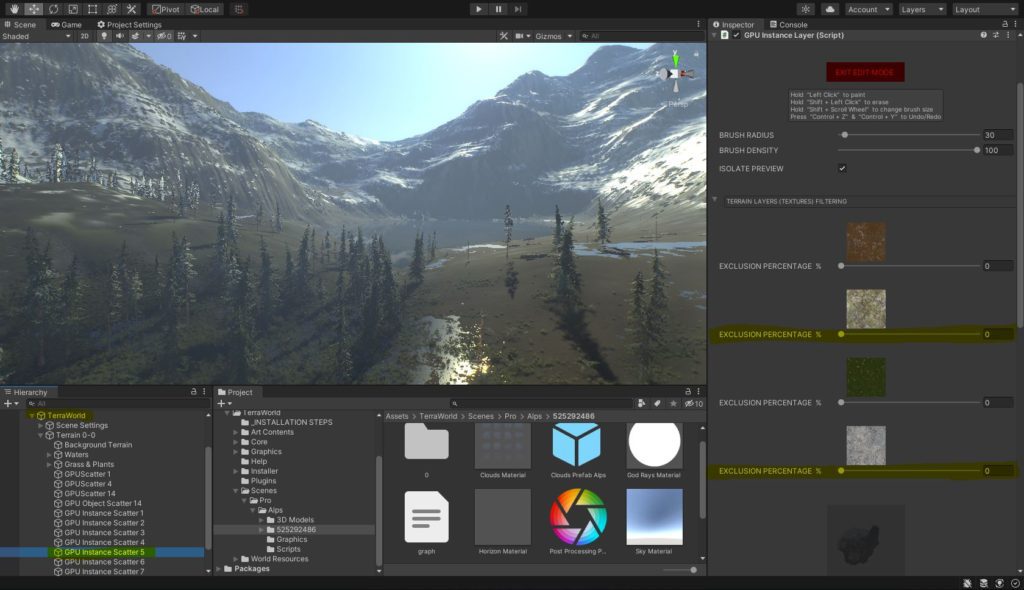
But we want one of our rock models to be specifically placed on top of these 2 textures. For this we select that layer under TerraWorld in scene and by pressing EDIT PLACEMENT in the inspector window, editing tools will be revealed to set the exclusion back to 0% for all texture types only for this model.
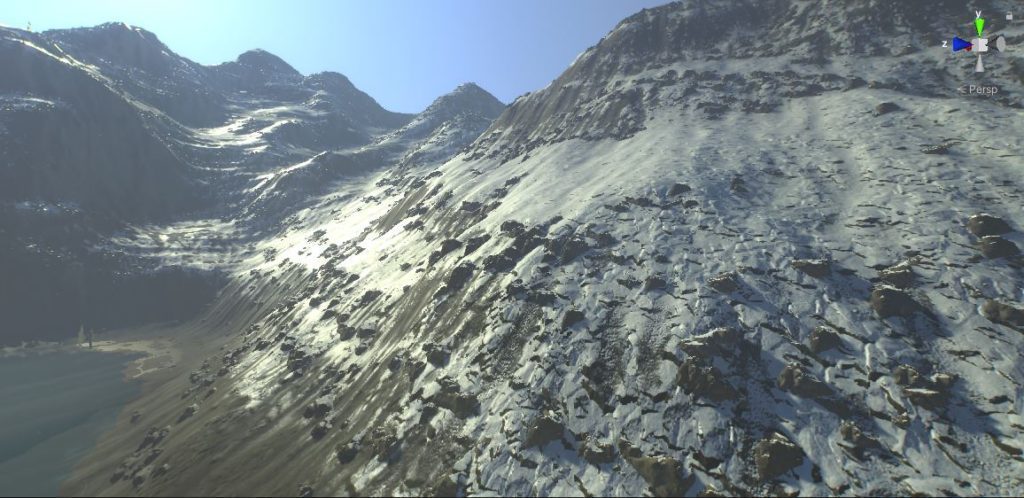
The following picture shows bear surface with no rock models on top of terrain’s rock textures with Exclusion Percentage of 100% for layer.
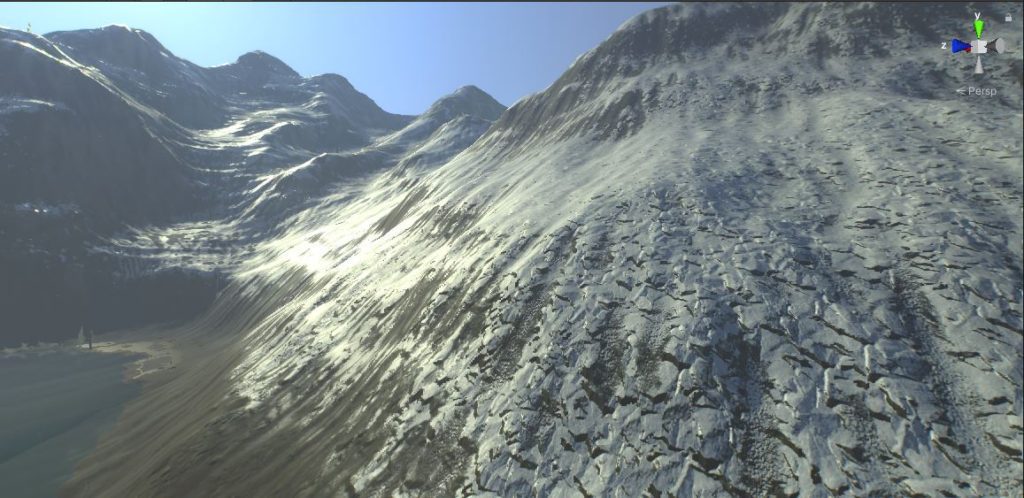
And the following picture shows rock models on top of terrain’s rock textures with Exclusion Percentage of 0% for layer. This will bring back rock models as the only layer on steep surface angles and on top of the 2 specified rock textures on terrain.
- All placed 3D models in scene use GPU Instancing to be rendered to bring the best performance while dealing with highly dense environments. But as they live only on GPU, they can not be selected in scene hierarchy like a normal gameobject.
For this, we have implemented a new system called “Dynamic Player Interactions” accessible via “PLAYER” tab in TerraWorld’s interface which converts all GPU models to normal gameobjects around user-specified target(s) for any interactions. If the model has colliders or any other components, they will become available for interaction based on given distance radius around any targets such as a camera, main character/vehicle, NPCs or any other dynamic and static objects in scene.
The common use-cases for this system covers all CPU-based interactions such as collision detection, rigidbody physics interactions and forces, gravity, raycasting queries, runtime navmesh, script/component behaviors and etc. between assigned targets and the world elements around them.
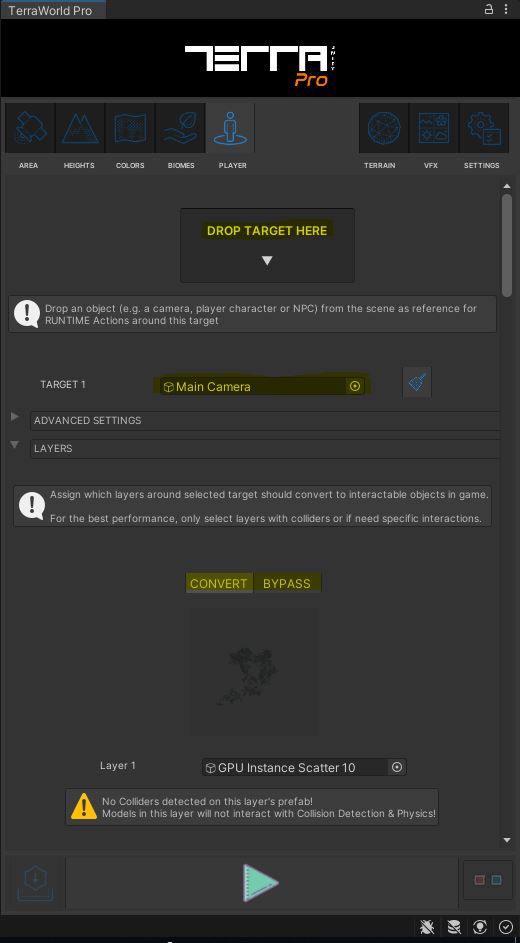
In this case, we dragged & dropped our main camera into the Target box at the top so it has been listed as “Target 1” which you can setup its conversion against all layers in scene which are shown as a list. You can add as many targets as you wish and they will calculate their surrounding conversion separately.
By pressing “Control” on your keyboard, physics balls will be thrown in front of camera (our single target) being the center of GPU to CPU conversion of the models to become interactable with the radius of 150 meters. See it in action as follows:
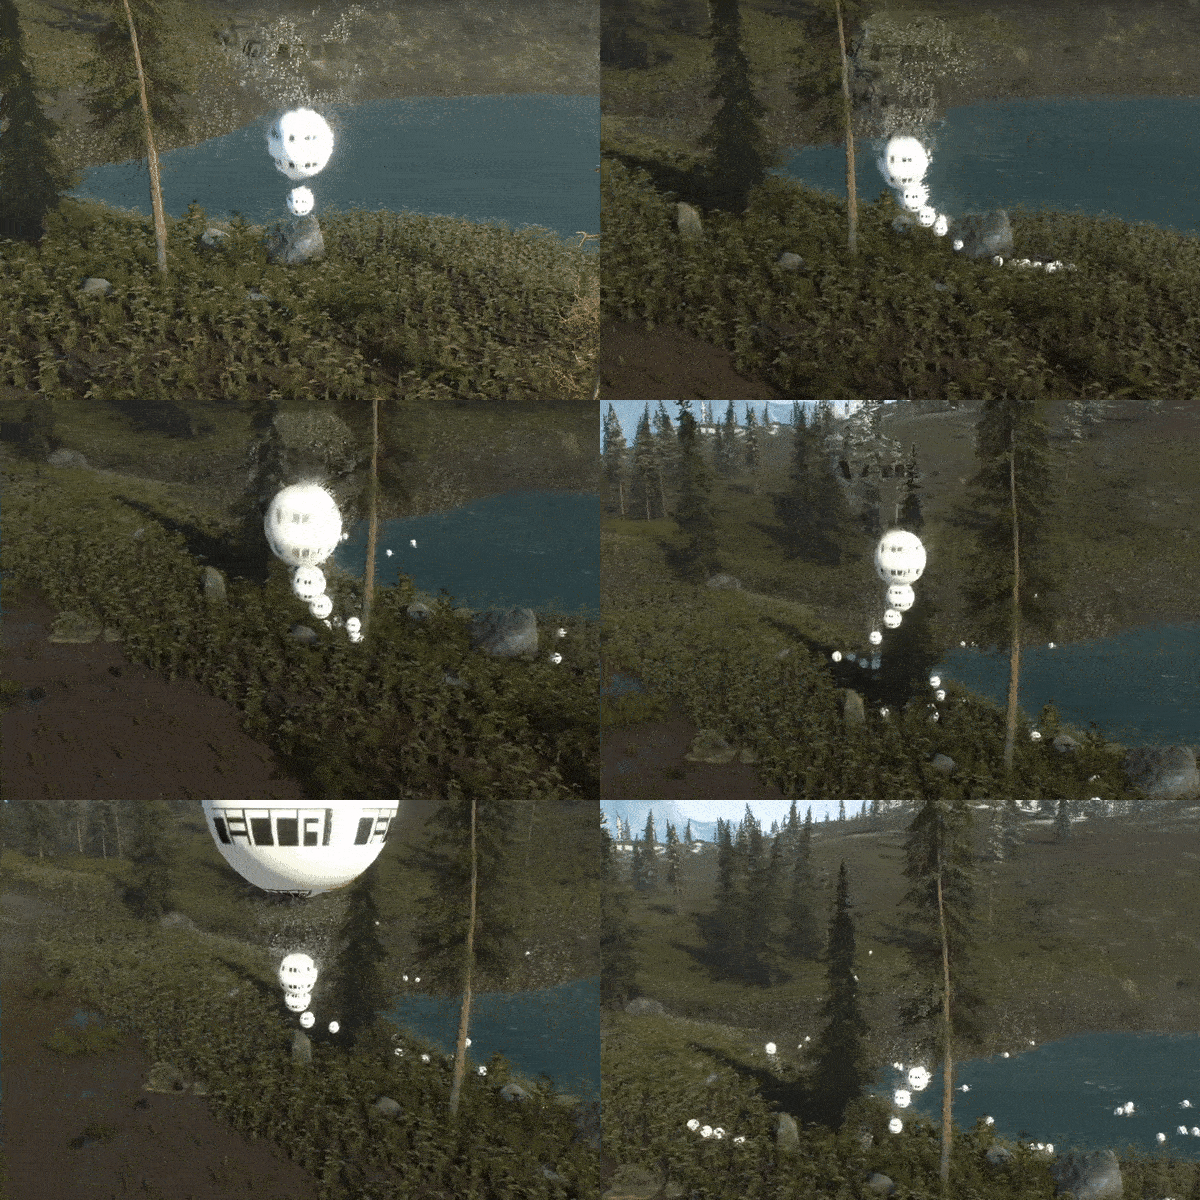
You can also see this system in action based on the main character instead of the camera in this video: https://youtu.be/XRtaf18C5qo
Further Notes:
- Other minor settings such as shadow distance, LOD Bias and etc. have been changed for better visuals since target platform was mid ~ high range PCs.
- Pressing “tab” button on your keyboard will switch FPS & Ram statistics display for testing purposes.
- Pressing “o” button on your keyword will switch Real-Time Occlusion Culling feature for all layers for testing purposes.
- By pressing “Control” button on your keyword, physics ball will be thrown in front of camera to test out 3D models interactions and GPU to CPU model conversion.
- There is a point light around the lake to show how lights react to volumetric fog mostly in shadowed areas.
- The build has been made using Unity 2019.4.18 and IL2CPP Scripting Backend.

